Author: Sara Barton

  • Four Day Safari in Tanzania

    Four Day Safari in Tanzania

    Take a peek at what a four-day safari in Tanzania is like, during the month of February.

    Recently, I had the incredible opportunity to go on a safari in Tanzania. This has always been a dream trip of my mom’s, so she and my grandmother tagged along as well. Keep reading for insights into what this was like – from planning to travel and everything in between!

    Booking a Safari in Tanzania

    Picking a time of year for your Tanzanian Safari

    There are multiple factors to consider when deciding what time of year you want to go on your safari:

    • Busy season vs slow season
    • Wet or Green Season vs Dry Season
    • Associated costs & availability

    For our safari in Tanzania, we wanted to pick an affordable option that also worked with my mom’s teaching schedule. While she has summers off, that’s a busier time of year for safaris in Tanzania. Therefore, associated costs are often higher (and temps are as well!). Instead, we opted to go over her school break in February. Added bonus: February is calving season in the Serengeti! Though we were concerned at first about weather, the rainy evenings made for a lot of greenery and beautiful landscapes. Overall, we stayed pretty dry in our safari vehicles as well.

    Zebras on green landscape from safari in Tanzania

    Picking a Tour Group

    When it came to picking a tour company for our safari in Tanzania, we had a few elements to consider. Cost, availability, group size, and sustainability were some of the top factors.

    After requesting proposals from multiple companies, we ended up booking with Tanzania-Experience. They offer several options for lodge, camping, and luxury safaris; we booked the Impressive Tanzania small group safari. We loved that this was an “everyone gets a window seat” experience. It fit the timeframe we needed, and the planning process was also very simple. We were even able to change the booking type to triple occupancy, add on a stay upon arrival, and book a balloon safari!

    One other element I want to emphasize is Africa Experience’s commitment to sustainability. I wanted to be sure whatever company we chose was as ethical as possible not just with wildlife interactions, but community and environmental impact. Even the lodges and camps selected each had their own policies and practices.

    Preparing for your Safari in Tanzania
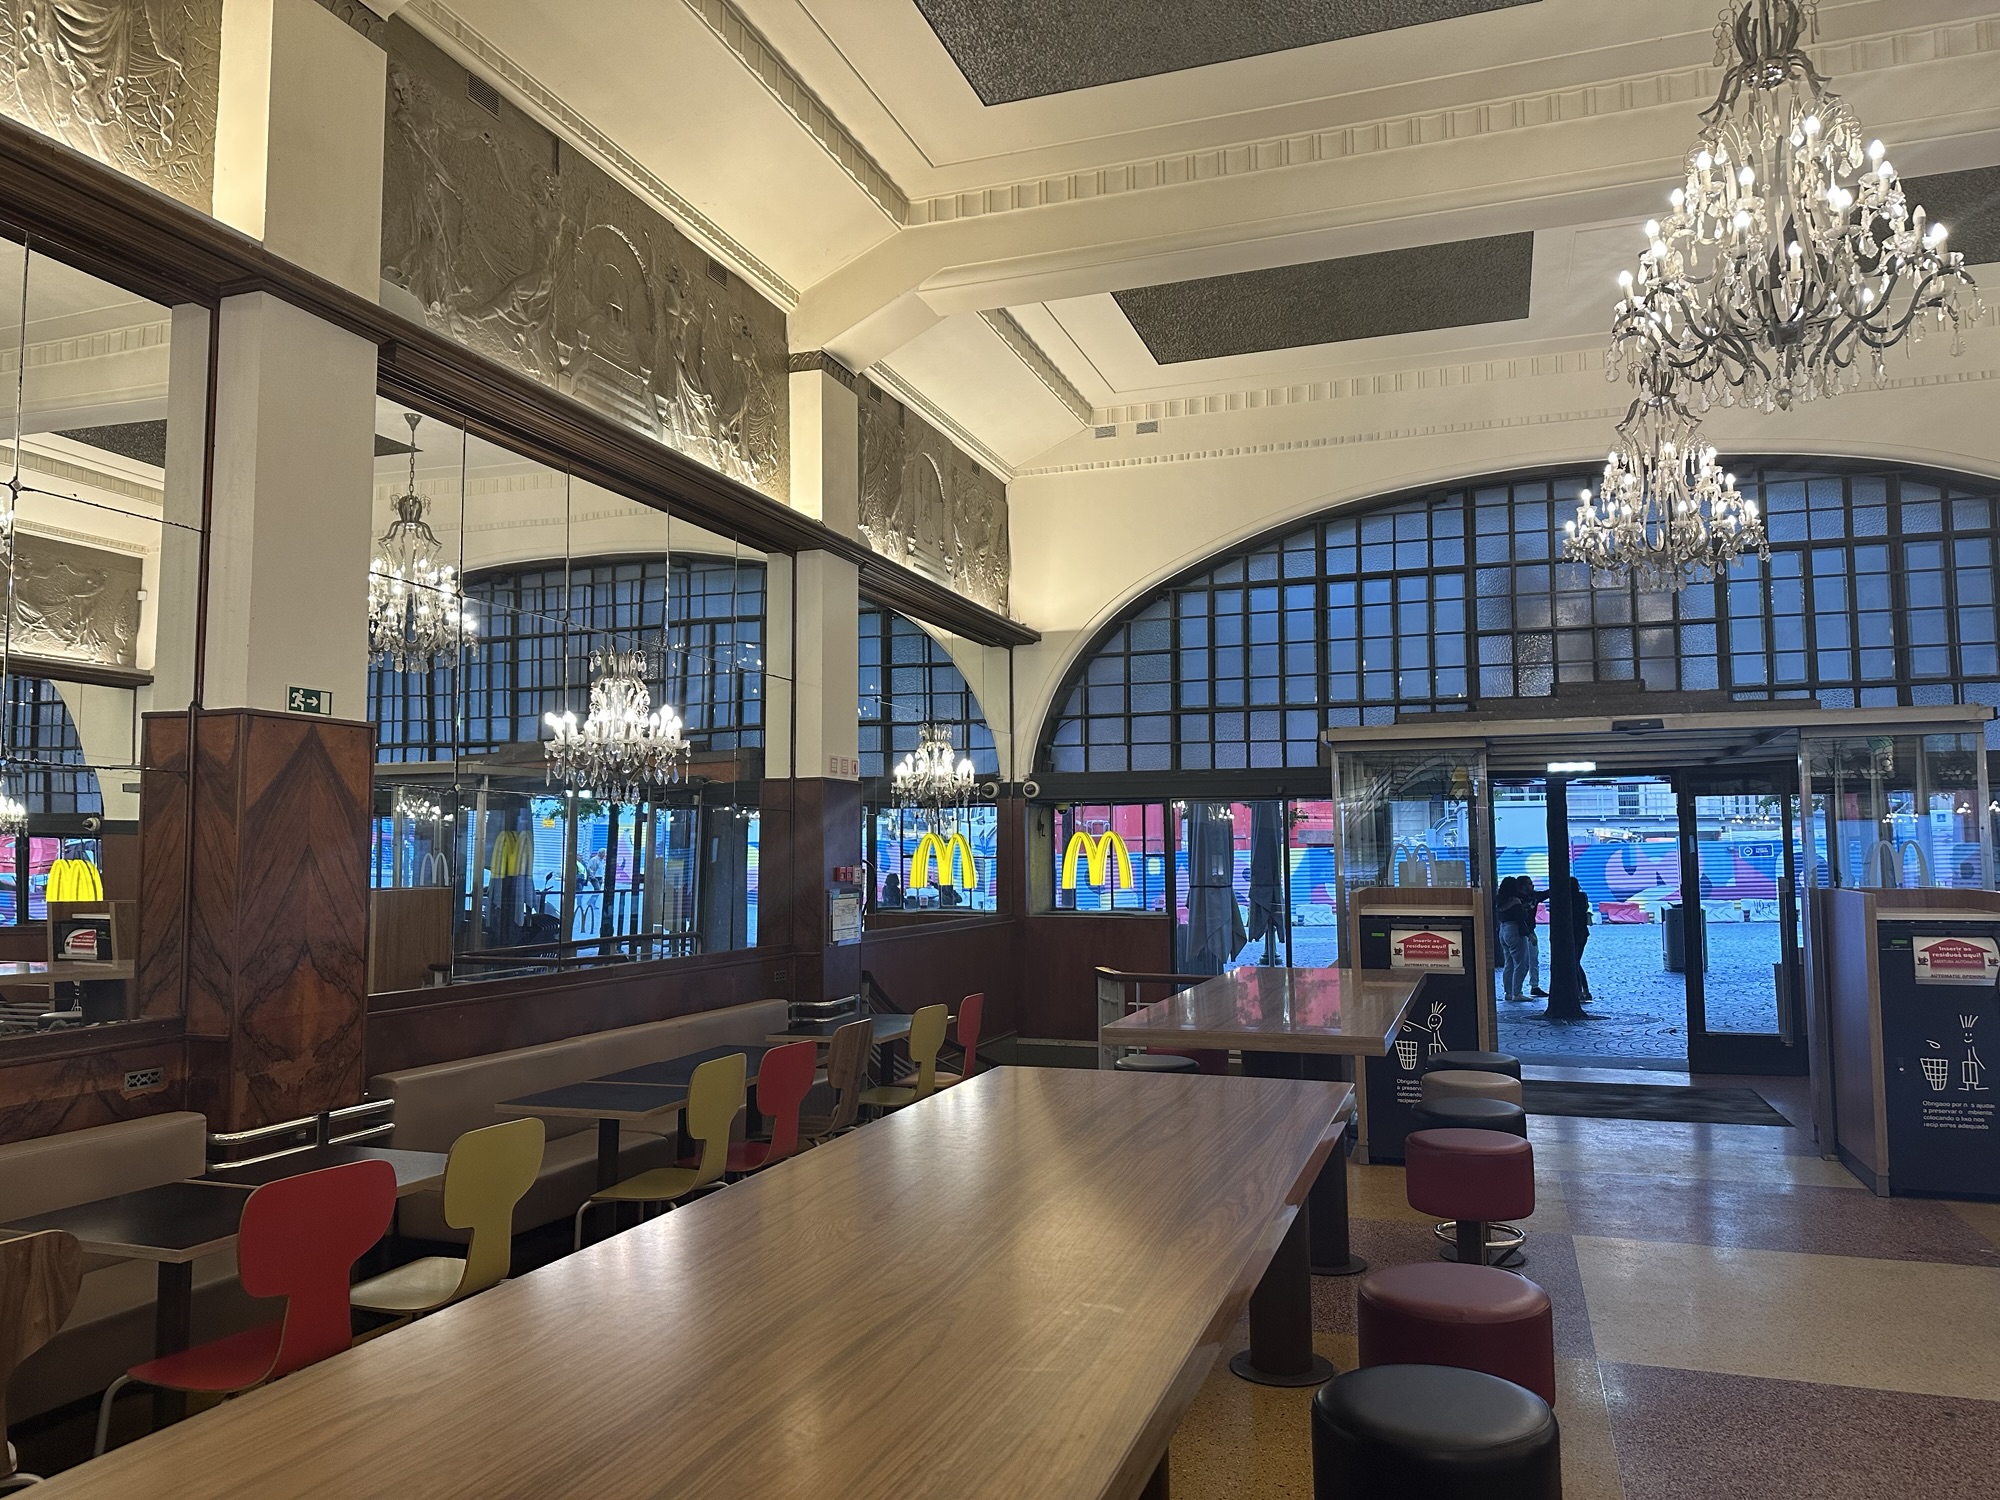
    Flights & Transfers

    Once we arrived in Tanzania, all travel was included in our itinerary. But how did we get there? Honestly, this was one of the pricier matters to handle – and we regret going with a cheaper option.

    We booked our flights through Priceline, which I would not recommend. Not even two weeks before the trip, my mom’s flights disappeared not once, or twice, but four times. Hours on the phone later, we were able to get her checked into the second and third leg of the flight. Unfortunately, we arrived at the airport to check in for our commuter flight and… her ticket was voided. We are still fighting with Priceline on this as we had to buy a new ticket to JFK.

    Immigration and Visas

    This part of preparation is going to differ for everyone depending on citizenship and passports. My best advice is to look at your governing body’s site, as well as the official Tanzania immigration site. Most travelers will require a visa of some kind; U.S. passport holders at the time of this article require a Multiple Entry Visa. We opted to apply upon arrival as we were all a bit confused on what we needed. That being said, it was a simple process upon arrival. You wait in different lines for application, payment, and confirmation, before you’re able to go through to baggage claim. Questions for our group were pretty standard – how long we’d be there, why were traveling, etc.

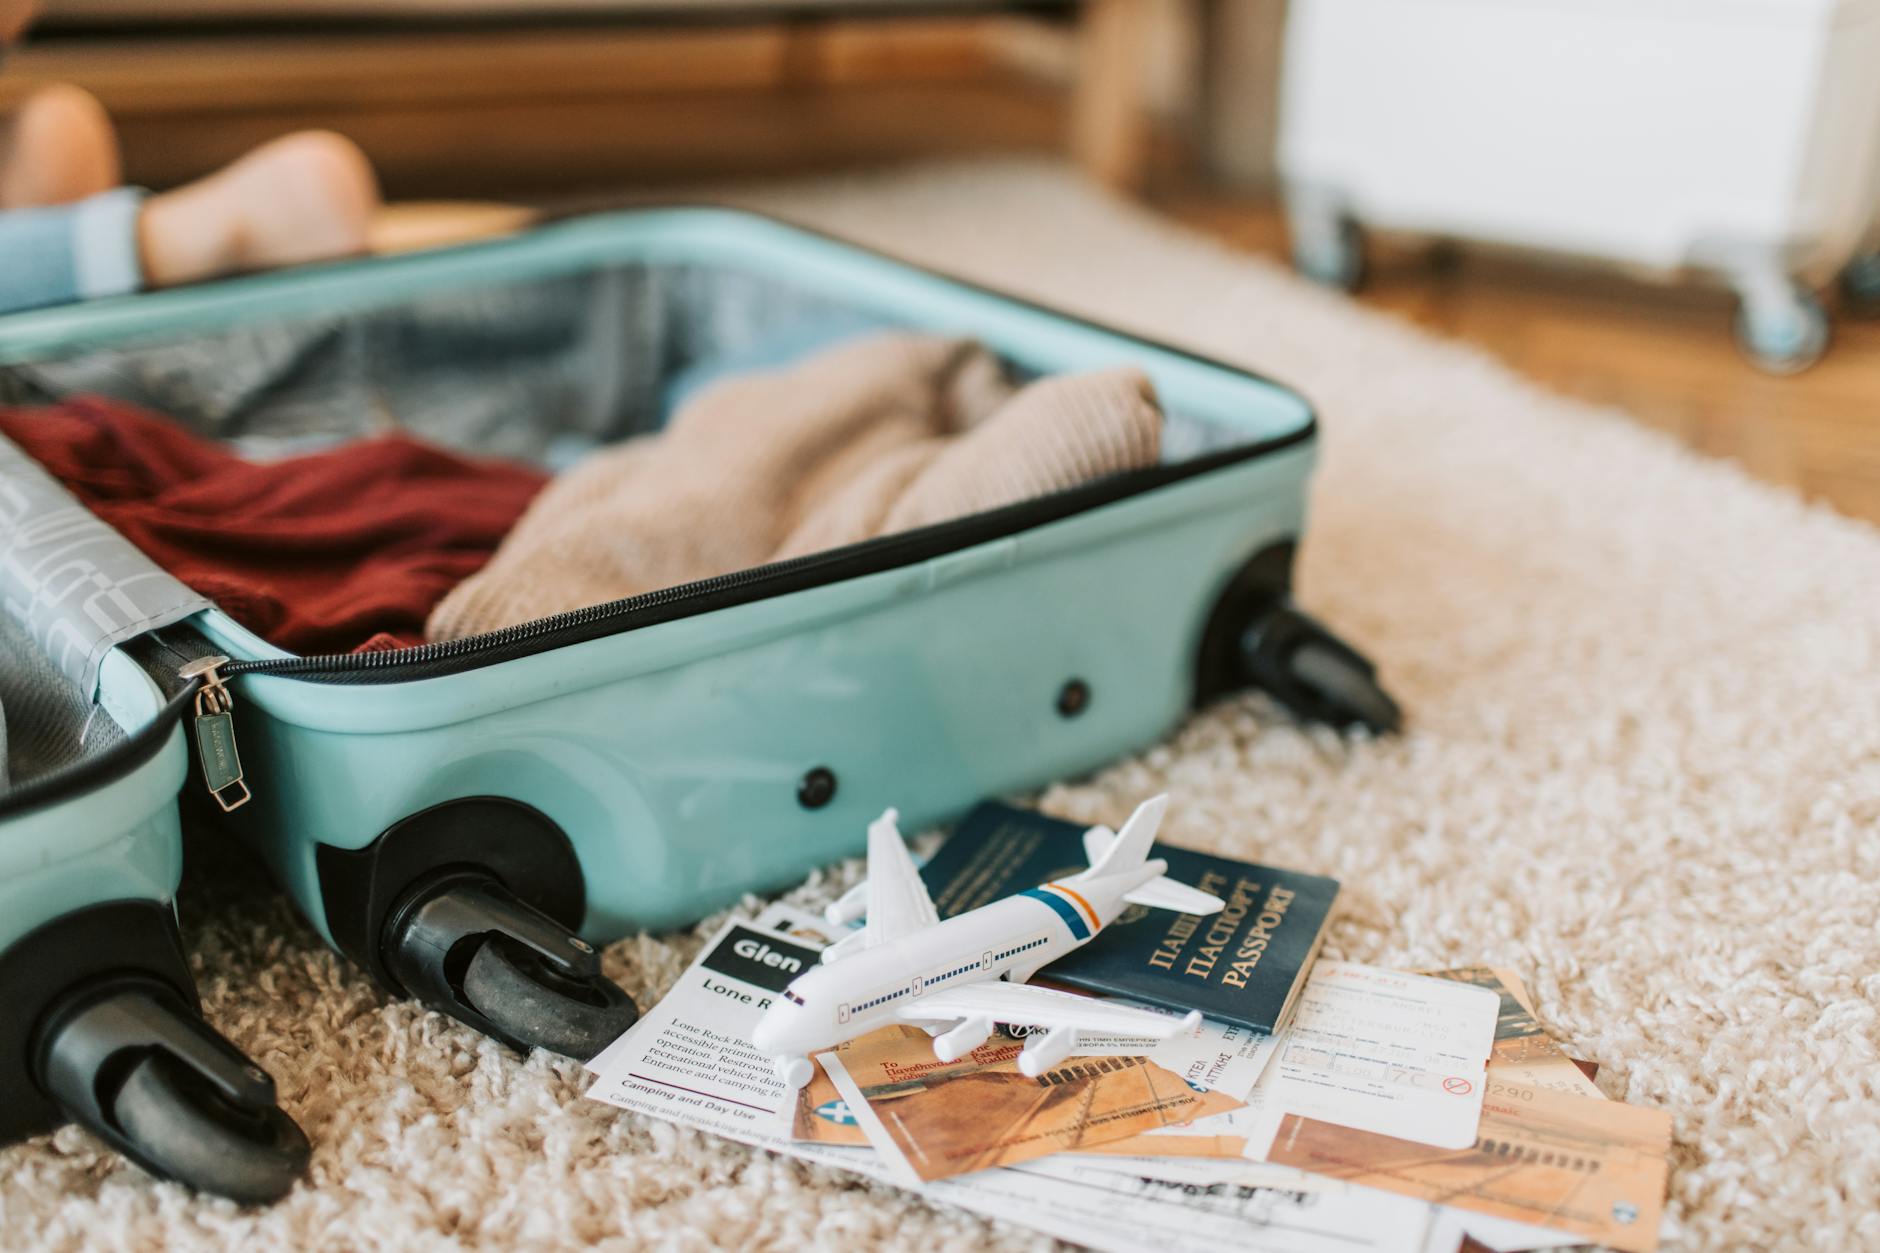
    Packing for your Safari

    I’ll write a separate blog on this one to dive deep. For more information on what I packed (and what I actually used), check out my mini series over on Facebook or Instagram!

    Safari Parks in Tanzania

    There are any number of parks one might visit on a safari in Tanzania. Our itinerary covered Tarangire National Park, Serengeti National Park, and Ngorongoro Crater.

    Day 1: Tarangire National Park

    Day one of our safari in Tanzania started with a pickup at the lodge and meeting the rest of our small group. We then set off for Tarangire National Park. Upon arrival, we checked in and had a picnic lunch before our first game drive of the trip.

    Known for its large elephant herds and baobab trees, this park was the perfect introduction to game drives. One of my favorite memories from this entire trip was in this park. Our vehicle pulled over to the side of the pathway to observe a group of elephants grazing. Next thing we knew, the group was on the move, fully surrounding the vehicle, so close I could have touched them (but didn’t!).

    We also saw some of the other wildlife Tanzania is famous for, including marabou storks, Maasai giraffes, zebras, lions, and warthogs. Fun fact: the name of the park can be traced back to/correlated with the term “River of Warthogs.” This comes from the Mbugwe language.

    This park has some man-made elements as well, such as a large watering hole, where we concluded our game drive. We got lucky again that the watering hold had visitors – another herd of elephants! We watched the babies splash around for a while before heading back to the park entrance.

    Day 2-3: Serengeti National Park

    A main reason we chose Tanzania for our safari destination was Serengeti National Park. An avid fan of nature documentaries, I wasn’t going on a safari without seeing it for myself (as well as seeing the Great Migration!). Our itinerary allowed for two days and two nights here, which was perfect.

    The first day in the park, our group got incredibly lucky. After driving several hours to get to the park, we were excited to get started on a game drive. We were met with hundreds of wildebeests and zebras, as well as two types of gazelles. One fun fact about planning a safari in Tanzania is that you can always see the Great Migration at Serengeti NP – you just have to be in the right region of the park for that time of year.

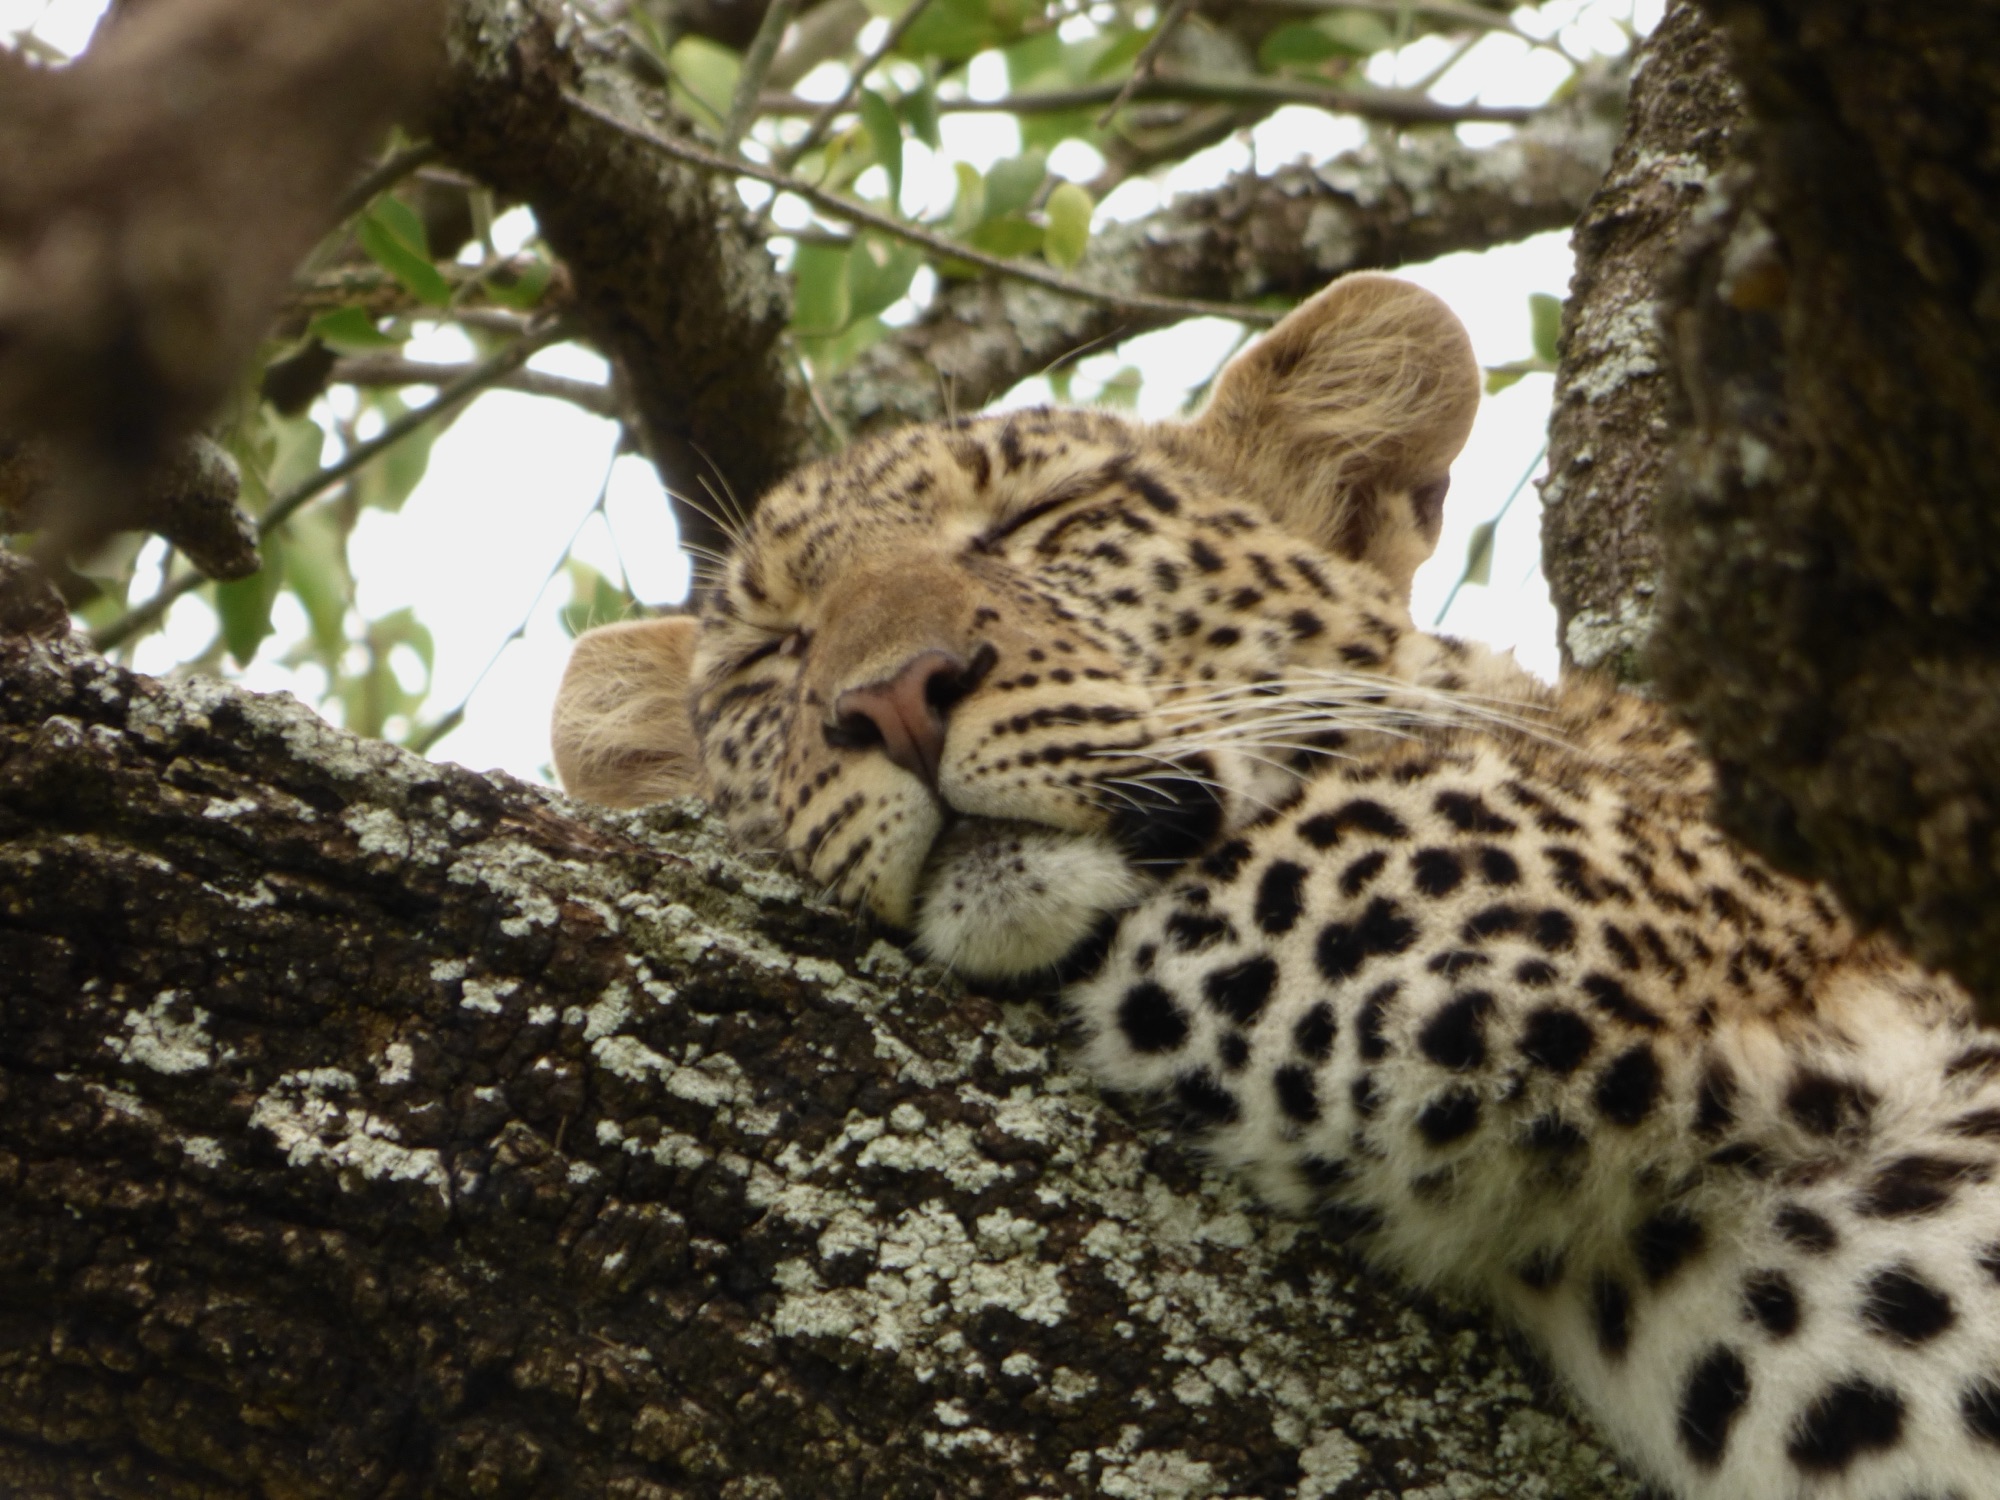
    After a bit of a drive, our guide received some communication for other vehicles – but we did not know what for. We were in luck! There was a leopard spotting! We got to see not just one, but three leopards that day, which is incredibly rare according to our guide.

    Our second day (and drive) we saw even more animals, including a cheetah family and several hyenas with their young. On this day, we learned that hyenas will hide their food in water to avoid other predators and scavengers finding it. We also saw a handful of large male lions – full manes and all!

    Serengeti Balloon Safari

    A true highlight of our time in the Serengeti was a sunrise balloon safari. Our tour company was able to arrange this for us, and the company booked with was Serengeti Balloon Safaris. This was an inCREDIBLE experience that I would recommend to anyone. Seeing the animals from the ground is already amazing, but from the sky? Incomparable. Seeing the migration especially from the air really gave some perspective into how large this natural event really is.

    After the flight, we toasted some champagne in the bush to celebrate. Our drivers from that morning picked us up and brought us to another location in the bush to have breakfast (which was delicious) before bringing us to meet up with our group again. If you’re booking a safari in Tanzania, and can afford the splurge, you can’t miss this experience.

    (Note: this is not a sponsored review, I just truly loved it that much).

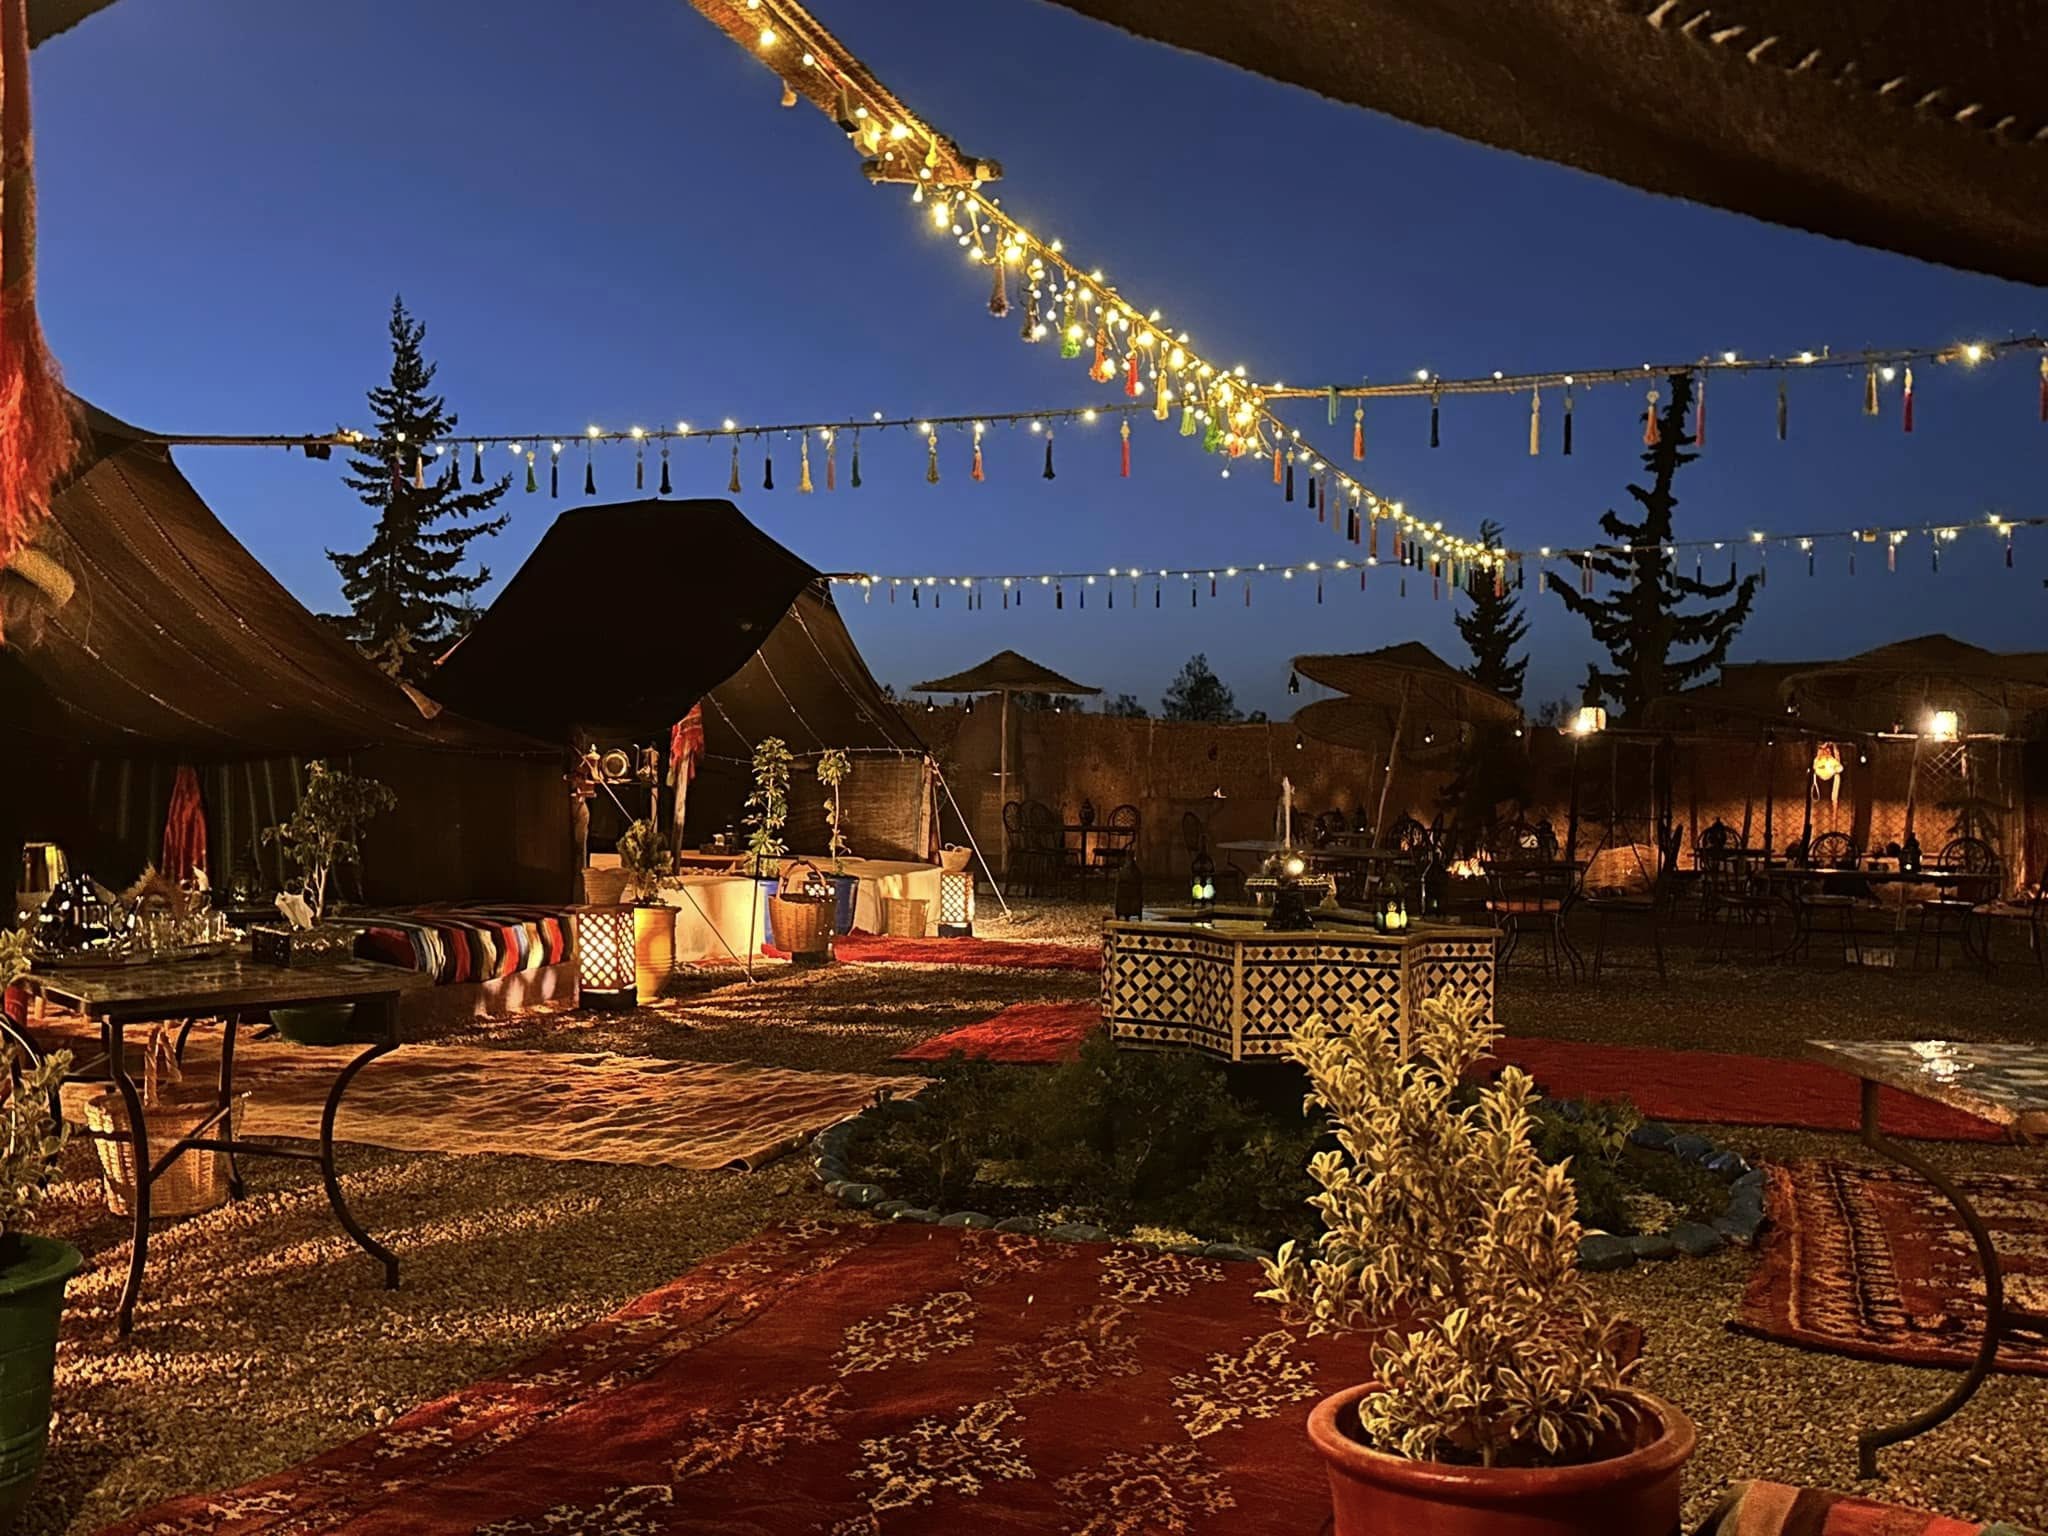
    Mobile Camping in the Serengeti

    Another highlight of this particular Tanzanian safari was getting to mobile camp in the Serengeti. While the other stays of the safari were at lodges, this was a campsite that changes location based on Great Migration patterns and location. If you’re not a big camper – don’t worry. This “camp” was in tents, but it had most modern luxuries as well – including real beds, wifi, and a working toilet in the tent. One bit of advice, however: bring bath wipes. There’s a bucket shower, but you’ll probably want to wipe off some dust still!

    This particular experience was a highlight to me due to the fact that we were sleeping actually inside the park. We not only heard lions and hyenas (did you know they sound like birds?) calling through the night, but we even had a giraffe run through our camp! Not only that, but upon entering the site, we saw a trio of lions laying in the path to our camp. Talk about amazing!

    As with other elements of this safari, the camp has an eco-friendly approach, which I also appreciated. If you’re booking on your own (or if you’re looking at tours!) check out Ndutu Kati Kati Tented Camp for your Serengeti stay. On top of all I’ve already said, the hospitality was next level, with the cook going so far as to make my mom a special meal on night two because she’d complimented the dish on night one. Highly recommend it!

    Day 4: Ngorongoro Crater

    The final park visited on our safari in Tanzania was Ngorongoro Crater. Honestly, this was one of my favorite parks, if for no other reason than the scenery. Going in February after the rains really brought out the natural beauty of the area.

    This park is located in Ngorongoro Conservation area, which we’d actually stopped in en route to the Serengeti on day two. We all felt the lookout that day was beautiful – it didn’t even compare to being in the crater area itself.

    Technically a caldera rather than a crater, this area was once as high as Kilimanjaro. Now, it’s home to any number of species – including two species of flamingos, hippos, black rhinos, and the Cape buffalo. We also got to see a number of baby lions, more hyenas, and even a jackal stalking a feasting pride of lions to steal some prey.

    Safari in Tanzania: A Summary

    Overall, I could not recommend a safari in Tanzania enough. Depending on what you’re hoping to see, I also think that February is a great time to go and save on cost as well. That being said, a few things to note are:

    • There are no sighting guarantees.
      • My group was incredibly fortunate to see every animal we hoped for. That will not always be the case, and that’s important to remember.
    • Short stays are great – longer stays are better!
      • For how much time we spent traveling to and from Tanzania, I do wish we had tacked on a few days on either end of the safari itself. I would have loved to see more of Arusha, or even taken a trip to Zanzibar to unwind after all the time in the car.
    • Choose your tour wisely
      • You shouldn’t need to spend a fortune on your safari. That being said, there may be a reason for lower (or higher) costs. Do your own research into why some will cost more or less than others. It could be expected weather and slow season, but it could also be an issue with quality or sustainability.
    • Be mindful of the travel
      • Something that isn’t always talked about is how much time is spent inside the safari vehicle. While the vehicle itself was rather comfortable with the company we went with, you know your body best. Be prepared with anti-motion sickness meds, and be ready for some rough roads.

    Are you looking to book your safari in Tanzania? Check out my socials for even more insight into my recent trip!

  • Surviving a Long Flight

    Surviving a Long Flight

    Tips, Tricks & Gadgets to Help You Through the Journey

    You’re booking a trip (or already have!) but now you’re dreading the 10+ hour flight. Surviving a long flight is no joke. How do you do it?

    I’ve taken many flights and only recently took my longest yet – NYC to Kenya. The way there took 13.5 hours, and the way back was 15. That was just the longest leg of the three-flight trip, but that was the hardest part!

    Now, what did I do to get through it? How did I prepare, and what did I bring? Here are some things that worked for me:

    Note: This article may contain affiliate links so that I may earn compensation for qualifying purchases as part of the Amazon Affiliate program.

    Tools for Surviving a Long Flight

    Preparing for the Journey

    Step one of surviving a long flight is taking care of yourself in the moments leading up to it. Some keys to that are:

    1. Stay hydrated
      • Not only in the hour or so before the flight, but throughout the week leading up, try to keep as hydrated as you can. You don’t need to chug water, but keeping a steady flow of drinking water is a good place to start.
    2. Take an airport walk
      • Before our flight, I had a 7 hour layover in JFK. It could’ve been easy to sit or lay on the floor and waste away, but that’s no good. If you’re about to be stuck in one spot for a long time, you’re going to want to move around. This will help with blood flow, as well as limit your restlessness once seated.

    How to Stay Entertained in the Air

    One to surviving long-haul flights in my experience is in keeping yourself entertained. Once your mind starts to wander, you focus on how bored you are, any discomfort you’re experiencing, etc. Here are two of my favorite ways to stay entertained during the journey:

    1. Watch movies – with an AirFly!
      • Most international (and even some domestic) flights have seatback entertainment systems to watch movies, play games, listen to music, and more. I don’t know about you, but I do not like the airline-given headphones. I’d much rather use my Bluetooth Beats I’ve had for 4 years. The AirFly was the solution! It is a bluetooth adapter for headphone jacks that let me use my preferred headset without worrying about cord-related issues. Truly one of the best things I asked for over the holidays!
    2. Read a book
      • I bring at least one book on every trip – usually I try to find one that’s set in my destination. For my trip to Tanzania, I brought along one of Jane Goodall’s books, In the Shadow of Man. I can’t recommend it enough!
      • If you’d rather have a book with internal lighting, try out a Kindle or other e-reader with the Libby app.

    Self Care on a Plane

    The second key to surviving a long flight is taking care of yourself. I know this can be easier said than done. Some things may not even come to mind at first. However, here are some of my tips for self care on a long journey:

    1. Choose your seat at booking
      • Personally, I always pick a ticket where I can choose my seat for comfort. In this case, I did end up paying more for extra legroom. As someone with a spinal condition and semi-recent surgery, I needed to be able to easily move around the cabin and stretch/get my blood flowing. My best advice is to pick where you’ll be most comfortable, as long as it’s not out of budget or within reason. If you wait too long, sometimes those are taken, so make sure you book early if it’s important to you!
    2. Stay hydrated (yes, again)
      • I always travel with a reusable water bottle and try to fill it before boarding (where the airport allows). I usually travel with my filtered LifeStraw bottle anyway, but any reusable bottle will do.
    3. Stay hydrated (have I told you enough yet?)
      • You may not think about it, but your eyes are very likely to get dry when you spend a long time on a plane. I saw these LumiDew Steam Eye Masks on a video before I left and I was glad to have packed a few – the heat and hydration really helped, and I even got a bit of rest after using them.
        • (Note: Please talk to a doctor before use if you have had recent surgeries or have other eye conditions).
    4. Wear compression socks
      • Similar to moving around, wearing compression socks will help with any potential circulation issues that arise from being in the air for so long. I recently bought some Wellow socks and they were incredibly comfortable!
    5. Bring snacks
      • Long-haul flights require that meals be provided, but I regretted not bringing a snack of some kind for the in between. I didn’t always love the food offered, and it wasn’t always at the time when my body needed something, so definitely bring at least a small something to get you through.
    6. Get some rest
      • Okay, this is easier said than done, I know. I usually pick a window seat to rest on for that reason – but I have yet to find a good pillow. One thing that helped me was using my Loops Quiet ear plugs. They’re made entirely of silicone, so they were comfortable for long-term wear. They also really blocked out the noise.

    Surviving the Journey

    Overall, the key to getting through a long flight is taking care of yourself – both physically and mentally. Be mindful of your neighbors, but don’t be afraid to get up and move, go stretch, take a restroom break, etc. Don’t hold yourself to just the airline entertainment; if you do, make sure you’re prepared with headsets you’re comfortable with and an adapter if you need it. With these tips, you should be well on your way to surviving your long flight!

  • Embracing Cultures Around the World

    Embracing Cultures Around the World

    How to Adapt To and Learn About New Cultures While Traveling

    Something that can be scary to folks that haven’t traveled internationally yet is the thought of embracing new cultures. How do you adapt to a new place? What if you don’t speak the language? Will you like the food? It can all be overwhelming.

    Transparently, even well-traveled people may struggle with exposure to some cultures different from their own. I know that I personally worry about new places, especially those unlike home. There are several ways, however, that I prepare myself to be more comfortable in these situations. Traveling is learning – about the world, about others, and about yourself. It’s okay to feel discomfort, it’s all about how you adapt to it.

    Embracing Speaking Culture: What if I don’t speak the language?

    I’ve been countless places where I spoke very little of the language, or even none at all. You may be asking how you can embrace new cultures if you don’t share language. My best advice is to try and learn a few simple phrases before going, such as:

    1. Please and thank you.
    2. Do you speak [insert native language here]?
    3. Where is the bathroom?
    4. Cash/credit card (for buying food and souvenirs)

    Before going somewhere, I also try to expose myself to as much of that language as possible ahead of time. For example, I knew I was going to Peru over a year in advance, and that Spanish was the main language I’d hear. I found a podcast called Coffee Talk Spanish and would listen any time I had to drive. I picked up some simple phrases, and was exposed to different accents and speaking speeds. While I didn’t become fluent by any means, I could have simple conversations with shopkeepers and waiters and felt more comfortable.

    As a failsafe, I always download the Google translate app and specifically the language of the region I’m visiting. That way, even if I have no cell service, I can communicate in a pinch. This was actually a lifesaver on my trip to Japan. I obviously hadn’t picked up Japanese very quickly and got lost when I took a train too far outside the touristy areas. I used the app to ask staff at a 7/11 how to get back to the train station. They were able to find someone in the shop that actually worked at the station, who walked me back. Talk about lucky!

    Sketch of a person asking a barista "Do you have milk that isn't from a cow?"
    True story: I once forgot the term “oat milk” in Spain and this is how I asked

    Embracing Clothing Culture: What should I wear in [x country]?

    A region’s clothing customs is something that I often try to look into ahead of a trip. In most cases, if you’re visiting touristy areas, you can get away with your regular outfit choices. That being said, it’s important to be respectful of the place you’re visiting. A few examples I’ve come across are:

    1. In most churches in Italy, you have to have your knees and shoulders covered to enter. This includes even the most touristy churches, like the Vatican. You can and will be denied entry if you’re deemed to be too exposed.
    2. In Morocco, most women that live there dress more modestly. While you won’t be noticed as much for not doing so in places like Marrakech, it’s still the most respectful thing to do. I made sure to pack lightweight, long trousers and a top or scarf I could use to cover my upper half. This offered added protection from the sun as well.

    Not only can dressing similarly to the locals help with respecting customs, it can help you blend in a bit. You’re less likely to be targeted as a tourist, I’ve found, the more you try to assimilate. Embracing a culture’s clothing practices can be beneficial in more ways than one.

    Embracing Food Culture: I’m a picky eater – should I still go to [x country]?

    Short answer: YES. One of the best parts of experiencing a new culture, in my opinion, is the food. That being said, I know everyone has different dietary needs and preferences. Here’s my advice on this one:

    1. Look up some staple dishes in the place you plan to visit. Pinpoint which you’d be willing or able to try.
    2. Stock up on snacks as backup. I’ve had to do this a few times myself when my stomach simply was not agreeing with the spices used (looking at you, Morocco). Even when I enjoy the food, I can’t always have it. Having something like protein bars or bread in my hotel or daypack can be a lifesaver.
    3. Explain dietary needs ahead of a meal, if you’re able. My host family was incredibly accommodating in Italy, and would try to find local foods that I could have. This also makes it clear that you’re not being rude, you just can’t have the meal.
    4. Stick to things you know. If you know you like meat and potatoes – find that kind of dish. If you are a pasta girl like myself, there’s almost always something similar available. Trying local versions of “safe” foods is still exposing yourself to the culture!

    Embracing Religious Culture: Differences in religions and beliefs

    This one can be tough for people for different reasons. Some may have strong beliefs of their own. Others may have no beliefs at all and don’t understand religious emphasis. Myself? I’m somewhere in the middle. I try to approach different religions with an open mind and, if nothing else, respect.

    Some regions emphasize religion and spirituality. We may not always agree with one another, but there are a few ways we can show basic respect:

    1. If you plan to visit a religious site, do your research.
      • Before I went to Japan, I knew I’d want to visit temples throughout Tokyo for their historical significance. I researched best practices for entering certain sites, and what was or wasn’t permitted by tourists. One thing I made sure to do was dress appropriately if going inside. I also learned about cleansing practices before entering.
    2. Listen to locals.
      • Not every setting is open for visitors. Some practices only allow certain groups within a religious building. For example, we learned about Islamic practices in Morocco and surrounding buildings. However, we were not allowed to enter active mosques if we were non-Muslim. If a sign or individual asks you not to enter, or engage in a particular behavior, please listen to them.

    I’m by no means saying we should all engage in religious or spiritual activities that we do not wish to. What I am saying is that we need to, as travelers, be mindful of the customs of places we are visiting. Even if something is advertised as a place to see at your destination, know that there could be more significance to it.

    How else can I embrace new cultures?

    Aside from the key points I mentioned above, my best advice to you is to research, but also to listen to representative voices. Don’t just listen to travel bloggers (myself included!). If you really want to know about a place’s culture and customs, tune in to and elevate local voices.

    Responsible cultural experiences

    As you continue to branch out in your travels, you’ll find a lot of offerings of “authentic” cultural experiences. Sometimes, they may be. Other times, it’s often people profiting off of tourists wanting to learn. I’ve been guilty of this myself, but what’s important is learning from those mistakes.

    Some of the best cultural learning experiences I’ve had have been through my trips with EF Ultimate Break. Since those tours are directed by locals to the country you’re visiting, the activities are also planned by them. In Belize, our director arranged for us to learn about Garifuna drumming. Our director in Morocco arranged for our group to visit a Bedouin/Berber family in the Sahara. We sat down and had tea with the family and learned about their life and practices. We also visited a local music house, Dar Gnaoua Bambara Khamlia, for a performance.

    Be open to cultural learning

    One thing about me is, if I don’t understand something, I’m finding the answer. This has especially held true when it comes to embracing the cultures of the places I visit. I love asking questions (respectfully, of course). My tour directors with EF and the guides they hire are the perfect people to ask. Even if you don’t go with a group, don’t be afraid to ask questions of staff and volunteers at different sites and museums.

    As I mentioned before, I also always try to do research on an area’s customs before arriving. I like to be prepared so that I don’t accidentally offend someone (or even break a law). If you aren’t sure of something, don’t guess – look it up! There are some things you may find mixed answers on, but that’s where I go back to my previous point. Amplify and listen to indigenous voices. If an American citizen says one thing, but a Peruvian something else, and I’m visiting Peru? I’ll be putting more stock into what I heard from the Peruvian individual.

    Learning Culture through Travel

    Like I’ve said before, travel is about learning and embracing the new. It’s about leaving your comfort zone. Being exposed to new cultures is one of my favorite parts about visiting another part of the world. I’ve learned so much not just about the places I’ve visited, but also myself. By embracing culture through travel, I’ve found new favorite foods and even new belief systems that I’ve applied to my life. I strongly encourage each of you to do the same. Learn, embrace, and adapt. Be respectful and mindful in your choices and actions. Most of all, have fun doing it!

    Garifuna drumming - Belize
    Garifuna drum lesson in Belize

  • Things to do in Belize

    Things to do in Belize

    Highlights of Belize in February

    Note: Product links in this article. As an Amazon affiliate I may earn a commission from qualified purchases from these links at no added cost to the user.

    Best things to do Near Belize City

    Belize City is home to the main international airport of Belize and therefore likely where you’ll start your trip. While where we stayed, the Belize Biltmore Plaza, was a nice hotel, we didn’t stay in the area for long. Truthfully, the city wasn’t very walkable and we’d heard information that it’s not the safest part of the country. That being said, it was a great jumping off point for my trip!

    A pro tip for arrival if you like alcoholic beverages: buying bottles is expensive on the mainland, so try to shop for anything you may need in the duty free section of the airport before you hit the road.

    Altun Ha Ruins

    On our first travel day we visited Altun Ha, one of many Mayan ruin sites in Belize. Learning about the Mayan history is one of the best things to do in Belize, in my opinion. We were given a guided tour of the grounds and learned about the Maya culture. After the tour, we were given some free time to explore some of the ruins, including climbing to the top of one of the temples.

    A majority of the site has not been excavated, with over 500 mounds existing on the property. The mounds are structures overgrown with grass that to most would appear as hills. A small museum is also on the grounds, with depictions of items that were found during initial excavation. If you’re looking for local gifts, there are also small stalls set up near the grounds. I brought home some coffee for a friend that she loved!

    Belize Zoo

    Around 45 minutes outside of Belize City is the Belize Zoo. Our tour director was able to arrange a stop here on one of our travel days. What’s unique about this zoo is that it houses animals found throughout Belize itself. Additionally, the animals housed there are rescues from the country or confiscations from the illegal wildlife trade. Some are also brought in from other rehabilitation and zoological centers. The animals kept there cannot be released for one reason or another, and so the zoo cares for them.

    The zoo’s focus is on education and conservation of Belize’s wildlife. It’s a great place to spot some of the more elusive and endangered animals, such as the jaguar and tapir. The exposure to these species helps promote their conservation with the general public.

    Best Things to do in Belize: San Pedro & Ambergris Caye

    From Belize City, we took the ferry to San Pedro. The trip is around an hour and a half, and can be a bit cramped and bumpy so bring your motion sickness meds if that’s an issue! I opted to sit on the top level and the airflow definitely helped. Unfortunately, there were some folks that got sick on the bottom level so be mindful of that. With that said, the trip lands you on the island of Ambergris Caye, the largest coral island in Belize. There, your main transit is walking, taxis or golf carts. If the island vibe is your thing, this is the place to be.

    Snorkeling at Hol Chan

    Hol Chan Marine Reserve is a barrier reef located off of Ambergris Caye in San Pedro, Belize. It is known to be one of the best areas for snorkeling and spotting marine life in the area. Unfortunately for us, we had bad weather the day we were scheduled to go. According to our guides, this mean being unable to go to the “best part” of the reef. Due to the roughness of the water that day and some inexperienced swimmers, most groups stayed close to the boat and saw only common reef fish. However, other groups that ventured further out saw turtles and rays! I would definitely revisit this area in better weather to give it another go.

    Secret Beach

    After snorkeling, our group was given the option to go tubing or to Secret Beach. I opted to go to Secret Beach and, honestly, would not recommend it. It’s especially not worth it, in my opinion, if the water is rough or the weather is bad. Because of the weather, the only real option was to go to a bar. We had some fun, until group members were harassed, at which point we decided to sit in the bad weather and wait for the rest of our group. This is not something I’d add to a return itinerary.

    Take a food tour

    An optional thing to do on my Belize tour was a food tour in San Pedro. As someone that loves trying new foods while traveling (especially Central and Latin American cuisine) I was all about this! Something that’s interesting about San Pedro specifically is that there is a blend of a variety of cultures. This leads to a variety of foods as well.

    Our food tour began with drinks and a few snack items. We, of course, had a rum punch. The first bites were of Jamaican influenced food: a conch fritter and jerk chicken at Jambel Jerk Pit. Had we had another night in San Pedro, I definitely would’ve been back for dinner!

    We then moved on to sample some tostadas, which were of course delicious! My favorite stop, however, was next, where we had homemade pupusas. We had the option of a variety of flavors, from simple cheese to pumpkin. These were a fan favorite, and many members of the group ordered more to go.

    Our tour naturally concluded with dessert – ice cream! We ended up at a shop with so many flavors to choose from. As a dairy-challenged individual, I selected a mango sorbet. But I’ll be honest, I did try a sample of a local staple, soursop. This is a tangy, tropical fruit that our group compared to a range of flavors like pineapple, strawberry, or apple. It’s definitely something to try yourself!

    Belize Food Bonus: Try Gibnut!

    While we tried this dish outside of our food tour, one unique thing to try in Belize is gibnut, or the “royal rat.” This dish comes in a few different forms, but we tried it stewed in a delicious sauce. It’s dubbed the “royal rat” because of the late Queen Elizabeth II’s affinity for eating it when visiting Belize. You can read more about this and other dishes I’ve tried while traveling in my blog “Eating Like a Local!”

    San Ignacio

    Tikal National Park – Guatemala

    Okay, okay. Tikal National Park is actually in Guatemala. However, it was still part of my trip to Belize and I couldn’t possibly write this without bringing it up. If you like history, wildlife, and greenery, this is your place.

    We started the morning by crossing the border – don’t forget your passports! We met up with our tour guide and transit for the day and drove to the park.

    Into the Jungle

    Unfortunately, I missed a big chunk of the park due to breaking my ankle the night before. (Yes, this happened. You can read all about it here.) While I rode to the main site in a wagon, my tripmates took a short trek through the jungle of the park.

    After a brief introduction to the history of the site, we were given the opportunity to explore the structures. This included being able to climb up to the top of Temple IV (with the help of a staircase). Fun fact: in addition to its Mayan history, Tikal was used for filming “Star Wars Episode IV: A New Hope.”

    After exploring the ruins, we took a guided walk back through parts of the jungle to go have lunch on site. Along the way, our guides told us of some of the wildlife they’ve encountered, such as and jaguars and over 285 recorded species of birds. We saw many birds, spider and howler monkeys, and of course coatimundi.

    Parting with our guides back at the border, we finished the night back in Belize at our hotel in San Ignacio.

    Cacao farm tour & chocolate making at Che’il Mayan Chocolate

    On one of our other travel days, the group opted to take a tour of a chocolate farm and learn how the Maya produced the sweet. We received a tour of the trees where cacao is grown and a lesson on its harvest. The guide even gave us the opportunity to try the fruit of the cacao tree! Following the tour, we had a homemade lunch and a chocolate lesson. Each person was given the opportunity to grind the chocolate, and we all received a sample at the end. Fun fact: the metate, or stone, we used to grind the chocolate has been in the family here for over a century!

    Things to do on the Southern Coast, Belize

    Cave Tubing

    If you’re an outdoor and nature lover, this is the activity for you. En route to San Ignacio, our group went cave tubing. This isn’t as action packed as you may think, but more of a (mostly) leisurely float down the river and through part of a jungle cave system.

    To start off, we were given a chance to swim and “cliff” jump at the mouth of one of the caves. We then set off on our journey, linked together in our tubes. Sadly, I don’t have as much footage as I would’ve liked due to a dying GoPro (oops! Lesson learned).

    In the caves, we learned about the formations and how they were created. We also floated by a waterfall within the cave system, which was something I hadn’t seen before. The remainder of the experience was spent floating through the jungle, taking in the greenery.

    Pro tip: Try to coordinate this experience around cruise ship arrivals. Cave tubing is one of the top things to do on a Belizean cruise stop, and the site gets crowded fast. Our director was able to rearrange our schedule to avoid the crowds when he learned of the cruise schedule and we more or less had the area to ourselves. I’d highly recommend it!

    Ziplining

    For the adventure enthusiasts, one of the best things to do in Belize is go ziplining in the jungle. This was my first time going and I loved it. The guides and safety equipment were more than up to standard, and the views were incredible. If you’ve never been, no worries – the course gradually made its way from short, easy lines to a longer line over the river.

    I’d suggest bringing an action camera like a Go-Pro, as I got some great footage of the scenery and even the guides doing tricks. I’d borrowed an older model from a family member, but now own the Hero12 and have taken it on several trips since. There are some helmets already equipped with a clip mount, so you don’t need to worry about the harness or lines interfering.

    Snorkeling in the Southern Cayes

    Our second snorkeling excursion had much better weather and calmer waters. We had the option to go snorkeling in the Southern Cayes, which I’d recommend to anyone. We more or less drifted along through comb jellies (no stingers!) in water with huge starfish and rays. Our guides even pointed out a scorpionfish, and allowed us to dive if we chose to. If you’re looking for things to do in Belize that are outdoors but still pretty relaxed, this is the best option in my opinion. Of the two opportunities, this was some of the best snorkeling in Belize.

    Garifuna drum lesson

    If you’re interested in culture and music, the one thing I’d recommend you do in Belize is learn about Garifuna drumming. I was fortunate that our tour director with EF arranged for local Garifuna drummers to teach us a lesson on the beach of our last hotel. They not only taught us the history, but we all had the chance to play with the group. The night ended with dancing under the stars (I sat out some of that due to aforementioned broken ankle…). Honestly, this was one of my favorite experiences I had in Belize.

    The Best Time to Visit Belize

    My trip to Belize was in mid-late February. Our tour director informed us that this is one of the best times weather-wise to visit the country. This is after rainy season (mostly) and just before the high crowds of the dry summer season. As someone from the Northeast U.S., it also served as a break from the cold, with temperatures reaching low 80s.

    Belize Activities for Everyone

    Belize is truly one of those countries that has something to do for any and every person. Well, except ice cave explorers, I suppose. Between the food, music, history, and outdoor and island activities, you can’t go wrong. I had opted for this trip because of the ease of going with a tour group last minute. I didn’t expect to fall in love with the place, and I can’t wait to return.

    Author at Belize sign in San Pedro
  • Best of Peru

    Best of Peru

    Trip Highlights from Peru in September

    Note: As an Amazon Affiliate, I may earn commission on qualified purchases from links in this article.

    My first full day in Peru was spent in the coastal city of Lima. Since we only had one day there, we had to maximize our time. We took a walking tour of the best parts of this coastal city. Some highlights included:

    • Miraflores – a beautiful district full of green space and flowers.
    • Paddington statue – Paddington is based on an Andean or Spectacled Bear. These are native to Peru, and so you’ll find several tributes to him in the country.
    • Historic Centre of Lima – area of consisting largely of Spanish colonial architecture and the Presidential residence.
    • Lima Cathedral – this third reconstruction houses many religious alters and the skull of conquistador Francisco Pizarro. Not to mention, home to black vultures that nest on its roof.

    Day Two: Best of Cusco, Peru

    Celebration in the square

    As we flew into Cusco on a Sunday, there was a religious parade happening in the main square. We were given time to walk around and take it in, as well as enjoy lunch. I had my first real taste of Peruvian empanadas and was sold.

    Cristo Blanco

    Later that day, we took an open top bus up to Cristo Blanco above the city. We took in sights along the route from locals flying kites to Incan ruins like Sacsayhuamán.

    Day Three: Best of the Sacred Valley, Peru

    Moray

    An early alarm clock brought us on our way to the site of Moray. This agricultural site lives in the Sacred Valley and was initially created by meteorites. Incan communities quickly realized that different plants grew at different depths of the crater. We learned from our guide how they implemented terraces to grow things from coca leaves to potatoes and corn. Did you know that over 3,000 types of potatoes and 300 types of corn can be grown in Peru?

    Maras Salt Mines

    Our next stop was to Maras, salt mines that are still in use today. En route we learned the history of these mines. Essentially, there was a point in time where the ocean covered plateaus in the region. Since much of the area is on a fault line, eventually earthquakes turned those plateaus into mountains. The water inside evaporated, leaving behind mounds of salt. Rainwater then began to wash the salt through the mountains.

    When pre-Inca individuals (Maras) discovered the source, they built terraces. These terraces have shallow pools for evaporation to occur, leaving behind salt. Individuals manually stir these pools and collect and carry the salt. There are almost four thousand of these pools.

    The different shades of water show different stages of collection, with brown being the newest. Once evaporation starts, there ends up being three colors of salt: white, pink, and brown. While only the white and pink salt are edible, the brown salt is often used medicinally.

    We took time to walk around the area, taking in the views of the pools and surrounding mountains, before heading to our next location.

    More of Cusco

    We finished our afternoon and evening back in Cusco. Fun fact about Cusco: Its name was actually Qosqo, meaning bellybutton. It was named this because the nation of Tawantinsuyu (Incan empire) came from the city.

    I started my afternoon with a small group learning about and painting our own toritos. These are small bull statues that typically live on top of Peruvian homes for protection.

    Along the walk to paint our tortios, we came across Hatun Rumiyoq Street. This is a unique street where structure on half the street is Incan, while structure on the other half is Spanish.

    Cusco Cathedral

    After our painting, we took a tour of Cusco Cathedral. While photos weren’t allowed inside, we learned a lot about its history, including the art inside. Much of the art was created by Inca slaves of the Spanish. Because of this, and their forced Christianity, they often incorporated aspects of their own beliefs into their art. For example, the Virgin Mary’s dress is shaped as a triangle to represent the mountains, or apus. There is also a famous portrait of The Last Supper, but with Peruvian influence, such as having cuy as the main meal and chicha morada to drink.

    Coricancha (Qorikancha): Temple of the Sun

    We finished our Cusco explorations with a visit to Coricancha, the Temple of the Sun. This site is sadly less than half of what it once was. The Spanish who wrote about it said there was gold two inches thick lining the walls. The gardens spread across the river (now a road, pictured below). They contained life sized gold statues of animals, people, and more.

    Following the Spanish conquest of Cusco, much of this temple was looted and dismantled. Gold statues were melted down, and stone was taken to create foundation for Santo Domingo.

    That being said, our guide taught us much about the history of the site. She also showed us how Incan innovation allowed for structures that withstood the earthquakes of the region. The way that the stones were made to fit together without mortar is still visible in some areas.

    Day Four: Best of a Peru Travel Day

    Millma’s Camelid Sanctuary & Shop

    Our fourth day was a travel day from Cusco to Ollantaytambo, where we’d stay the night before heading to Machu Picchu Town. The day started at a camelid sanctuary and alpaca clothing co-op called Millma’s. Here, we learned about and met the various camelids of Peru – vicuna, llamas, alpacas (two types), and guanaco.

    This location is unique in that they’re legally allowed to care for the vicuna. The vicuna is the national animal of Peru but largely hunted by poachers due to its fibers. They are the softest of all the camelids, but they produce less than half of an alpaca’s fiber production. Because of this, their fiber is highly valuable and sought after. The vicuna on property at Millma’s is young, and came to them from a family that had protected it from poachers. Unfortunately, the baby became attached to humans and would not be safe in the wild.

    In addition to housing camelids, Millma’s serves as a co-op for indigenous women weavers. Each month, weavers from different communities come to Millma’s for an opportunity to sell their products and earn a fair wage. Millma’s prides itself on paying a proper market value for fibers and goods, unlike many cheap tourist stands.

    Urubamba Valley, Mercado Artesanal, & Peruvian Silver

    Along the way to the ancient city of Pisac, we stopped at a lookout over the Urubamba Valley. The valley is named for the Urubamba river. Incan belief was that the river was sacred, as it mirrored the Milky Way galaxy.

    We also stopped at a shop in Pisac to learn about Peruvian silver, from its origins to the common symbolism. Following the silver shop, we were given time to explore the Mercado Artesanal. This market consists of stalls of local artisans selling their wares. Regional goods include pottery, woven products, and paintings.

    Ancient City of Pisac

    Our final stop of the day before turning in was the Ancient City of Pisac. Here, our guide taught us about the history of the region, which actually began before the Inca civilization. When the Inca arrived, they merely improved existing architecture rather than destroy it. You can see an example of this in the ruins pictured below. They also improved existing terraces, making them suitable for agriculture.

    We also learned about the largest known burial ground for the Incan empire. Pictured below, this burial site consisted of graves in the sides of a cliff. Community members would repel down the cliff to bury their lost individuals and small items to take with them into their next life. Sadly, most of these were looted long ago.

    Day Five: Machu Picchu Town & Guided Tour of Machu Picchu, Circuit 3

    Arrival to Machu Picchu Town

    From our hotel in Urubamba, we started our journey to Machu Picchu town. We took a train from Ollantaytambo specifically geared toward Machu Picchu travelers. Pro tip: Pack light for this train, as space is limited. We each took a small soft sided bag and left our bigger luggage in storage back in Cusco since we were returning there the following day.

    We arrived in Machu Picchu Town (known to some as Aguas Calientes) with some time to kill before our bus to the ruins. After dropping off our bags at the hotel, we set to exploring. A friend and I grabbed coffee and breakfast and took tome time to relax. While at breakfast, however, a protest came through the streets.

    We learned that day that the protests were related to government interference over tourism to Machu Picchu. In fact, those same protests later shut down operations to and from Ollantaytambo.

    Circuit 3 of Machu Picchu

    Our first visit to Machu Picchu was to Circuit 3 with a local guide. This is an inner loop close to the ruins. We were taught about the history of the city and given explanations as to all the buildings still visible. Unfortunately, we learned, there is currently mass erosion at the site. This has already lead to loss of access to such areas as the Temple of the Three Windows. Our guide emphasized the importance of being ethical visitors – staying only on designated paths, not bringing in garbage, and using rubber tips if walking aids are required.

    Honestly, no words can describe how it felt to finally lay eyes on this World Wonder. There is an energy and reverence throughout the grounds unlike anything I’ve ever experienced.

    My best advice is to try and go twice in your trip – once with a guide to learn, and once on your own for reflection time. Our tour guide arranged our tickets for us; otherwise, know that they typically book up months in advance. There may be even more limited access in the future due to travel logistics and current erosion. If this is on your list, do your research well in advance.

    This circuit wasn’t particularly challenging for me, as a whole. There were a few steep stairways, but overall it was manageable. I’d recommend it for anyone wanting an interior look, and anyone with more physical challenges.

    Day Six: Machu Picchu, Circuit 2

    Our second day in Machu Picchu Town started with a trip up to Circuit 2 with the option of doing the trail to the Sun Gate. I set out on this trail with the best of intentions, but was definitely met with challenges. Between the altitude, my asthma, and an ankle awaiting surgery, I really struggled on the optional trail. Please go into this with an open mind if you are considering the attempt.

    In the end, I made it about 3/4 of the way up to the gate before opting to turn back. Trip mates of mine did make it all the way. Even if you don’t get to the gate, I’d still recommend checking out the trail. It offers some solitude and unique views of the site.

    Since we were on a time crunch and I was slow moving, I decided eventually to turn back and go to the main lookout point. This is the point many post pictures of. Honestly, I could have stayed there all day, even with the crowds. There’s a great view of the grounds and mountains from above. You can see the Urubamba River. It was truly one of my favorite moments of this trip, even after the struggle I had to get there.

    At the end of the visit, we made our way back to the train station to go back to Ollantaytambo, and then returned to Cusco. I do wish we’d had more time in Ollantaytambo.

    Day Seven: Best Underrated Hike in Peru – Palcoyo

    Hiking Palcoyo was an option added to our itinerary shortly before leaving on our trip. Most have heard of Rainbow Mountain in Peru. However, did you know there’s more than one rainbow mountain?

    The viral “rainbow mountain” is called Vinicunca and is located outside of Cusco. Lately, it’s been a controversial source of tourism. Communities have been affected by the virality, and not always in a positive way. It’s also often crowded and treated as a photo op.

    Rather than go to Vinicunca, our group went to Palcoyo. I’ll be honest with you – it makes for a LONG day. We left our Cusco hotel at 4 am and drove over 3 hours on largely dirt roads. The altitude is high, with the trailhead sitting at 4,700 meters (15,400 feet). All of that said, it was entirely worth the effort.

    These mountains have a rainbow color due to mineral deposits and consistent shifting of the tectonic plates. This creates a distinct “rainbow” on much of the mountains in the area. These colors are more or less vibrant depending on weather conditions and lighting, so keep that in mind.

    This particular hike was quieter than most viral hikes in the area, especially with how early we arrived. The surrounding area is farmland, with llamas and alpacas roaming. Our group was met with and led by multiple chiribaya, or Peruvian shepherd dogs. I’d recommend the hike to anyone (and I’d also recommend bringing hiking poles!). It truly is one of the best landscapes of Peru, in my opinion.

    Returning to Peru

    When all is said and done, my time in Peru was far too short. The highlights throughout this article are the best experiences and places I visited in my brief visit. If I were to return, these are places I’d consider visiting again (especially Machu Picchu!).

    With that in mind, there are other areas considered the best of Peru that I’d love to see upon return. Those include:

    • Huacachina
    • More of Lima (especially to try more food!)
    • Lake Titicaca
    • Arequipa
    • Choquequirao
    • The Amazon

    Until we meet again, Peru!

  • Making Travel Affordable

    Making Travel Affordable

    Tips on how to budget for traveling

    There’s no lie to the belief that travel expenses can add up. From hotels and flights to activities and food, how do I make travel more affordable? Below are some tips for managing travel expenses and budget for trips that I like to use myself.

    Afford higher budget trips using payment plans.

    Especially when it comes to big trips, I often book with companies that allow for payment plans. One of my favorite tour companies that allows this is EF Ultimate Break. They also have a few sister companies with similar models.

    Group trip through EF Ultimate Break
    Tour Group with EF Ultimate Break

    Anything that allows me to put down a deposit and make payments along the way is a plus in my book. I’ve also put bigger expenses such as flights on payment plans through Uplift (now Flexpay) or Affirm. There is interest involved, but it’s fixed and factored into your monthly payment plan. Just make sure whatever the monthly amount is fits into your regular budget.

    Book through a tour company

    One of the other perks of traveling with a company such as EF is that they often get discounted rates. Overall, this makes their trips a more affordable option than trying to book it all yourself. They can get group rates on hotels and discounts on flights and activities. For example, the cost of five extra activities on my trip to Belize cost me the same as one of the activities would have been if booked privately. This makes group travel often a more affordable option for those big, eventful trips.

    If you’re unsure of when to book with a group or not, check out my blog on how to plan a trip on your own.

    Reserve now/pay later to make payments manageable.

    Similar to payment plans, I try to book hotels or activities that are Reserve Now, Pay Later. This allows me to keep shopping for other deals while not having to worry about losing a booking in most cases. It also gives me extra time past making the reservation to pay for it or save up. By the time the trip comes, I have either set aside the funds or paid on my own leading up to my arrival. By doing so, travel is made more affordable in the longterm.

    Use pay over time or reserve now, pay at property filters like this to make travel more affordable.

    Use credit card points to afford flights and hotels.

    Note: I am not affiliated with or sponsored by Capital One. I personally use the card and I may get a bonus from approved referrals at the link below.

    Capital One's rewards and benefits

    I currently have the Capital One Savor One card. This card gives cash back for all purchases, with the highest being dining and entertainment. I try to put most purchases on the card to accrue points that I can later use in their travel portal. My best advice if you go this route is to make sure you find a card that works for you, and only spend what you know you have the budget in your bank for. I’ve previously saved up to get a discount on plane tickets, and the points can also be used toward hotels and car rental.

    If you’re interested in applying, here is my referral link for their Savor Card: https://i.capitalone.com/J8AbdE3qX

    Many cards exist with similar cash back options. Utilize the best method for yourself, and shop responsibly.

    Equip price tracking tools to book at the most affordable times.

    Another perk of my Capital One card is that I can track flight and other travel prices through their portal. Even if I don’t book through the travel portal, I sometimes use this tracking tool to guide the best time for me to buy my tickets.

    These types of tracking tools exist on many different travel-related sites. Some other tools I use include:

    • Expedia
    • Google Flights
    • Hopper
    • Skyscanner
    Travel price tracking tool from Expedia
    Expedia’s Flight Price Tracker

    Plan your trips in advance.

    When possible, I try to plan trips as far in advance as possible. This goes hand in hand with my payment plans. The further out I book, the smaller the monthly or bi-weekly payments are. This also helps with being able to save up for and plan the extras for the trip itself.

    For example – each of my group trips I’ve booked over a year out. I made my deposit during Black Friday with EF Ultimate Break. They have their own payment plans, or the option to make a higher deposit and pay by a specific end date. By planning it out that far, the payments and deadline are much more manageable.

    Be flexible with your budget and plans.

    We all have our ideas of dream vacations. I love the idea of a luxury experience everywhere I go. However, I know that’s not usually a reasonable expectation. I’ve learned to be more flexible with what I want out of a trip, including where I stay.

    When I went to Portugal solo, I wanted to book with a hotel rather than a hostel for privacy. With the hotel rates, the best compromise was to book a private ensuite room in a hostel instead. This honestly ended up working out really well for me!

    I’ve also learned to be more flexible with other items – where I plan to go out to eat, balancing tours vs. solo experiences, etc. This helps manage not only expectations, but my budget as well.

    Afford expensive destinations by traveling in the shoulder seasons.

    As long as your plans don’t revolve around a specific time of year, one of the best ways to save money is by traveling during shoulder seasons. I’ve done this a few times in the last couple of years. For example, I traveled to London in April and Portugal in October. Not only do you benefit by usually having fewer crowds, you can also save money. This is especially useful in destinations that can be on the more expensive side, like parts of Europe in the summer. If you can be okay with certain weather conditions and other minor inconveniences, you can make your trip that much more affordable.

    Shop sales for the most affordable travel options.

    Like I mentioned previously, I often book my EF tours in advance and one of the best times to do that is during their Black Friday sale. They also have sales throughout the year, and will price match up to a certain time after initial booking if the cost of the tour goes down. Additionally, repeat travelers receive a new discount code after every trip!

    In addition to EF’s sales, I use email subscriptions and more to keep up with other sales. These can be sales on airlines, tours, and more. One of the best times of year to book is Travel Tuesday, a big time for discounts specifically in the travel industry. This comes the Tuesday following Black Friday, with some companies announcing deals in advance. These sales are especially useful if you have flexibility in timing or destination.

    Make extra income to put toward travel.

    While I do work full time, I also work a second job. Since I work remote, I have the privilege of being able to offer in-home pet-sitting services. For the most part, this gives me flexibility in availability and the option to say no if a job doesn’t work for me. That being said, any extra income I make goes directly into savings and/or toward travel expenses. This works notably well with my payment plans and reserve now, pay later bookings.

    Some other options I’ve had success with for more minimal extra income are selling old items on marketplace, completing surveys through Mechanical Turk, and the Amazon Affiliate program.

    Utilize partner plans to afford flights and hotels.

    If you have loyalty to particular airlines or chain hotels, I’d recommend looking into any of their partner programs. These are programs that help you earn miles and more with your preferred brand by spending other places. For example, if you fly often with Delta, you can earn miles with Uber and UberEats, as well as their SkyMiles Dining program.

    Many airlines also work as part of an alliance that allow you to earn miles for traveling with other airlines in that alliance. Be sure to register for and take advantage of the free mileage programs and add your user information to your flights. This can help you maximize your miles earned, making them more useful at an earlier timeframe than relying solely on taking flights to earn. In the long run, you can afford to travel more if you’re paying less per flight or hotel.

    Travel Can be Affordable

    There’s no one solution for affording to travel. I understand that everyone has different expenses and income. While you may not always be able to afford the “dream trip” you’ve seen online, traveling on a budget is possible. With some saving and strategy, many can afford to travel more.

  • Travel Gifts for the Holidays

    Travel Gifts for the Holidays

    A holiday gift guide for travelers

    It’s that time of year again – we’re looking for the perfect gifts for our loved ones. What do you get for the person in your life that loves to travel? Keep reading for a list of my favorite travel gifts that I’ve received in years past.

    Note: This article may contain affiliate links so that I may earn compensation for qualifying puchases as part of the Amazon Affiliate program.

    Electronic Gifts for Travel

    • A Bluetooth headphone adaptor for long-haul flights is perfect for those wanting to use their own headphones on the plane. This is actually something on my personal wish list!
    • If your loved one enjoys taking photos of their travels, consider the following items:
    • I’ve said it before and I’ll say it again – a portable charger is one of my all-time travel essentials. I try to keep more than one on me as well, so I’d never be mad at receiving this as a gift.
    • If the person you’re shopping for has the camera for it, Polaroid or Instax film is a useful gift to document their travels.
    Camera film is a great gift to document travel

    Gifts for the Solo Traveler

    • A travel-sized tripod is great for capturing pictures and videos while on their own.
    • My sister gifted me a travel door lock for Christmas last year. This is a wonderful option to give your solo traveler some added security when traveling alone.

    Gifts for International Travel

    • I recently bought these steam eye masks for an upcoming long-haul flight, as recommended by a TikTok video. They’re individually packaged and meant to help relax and keep your eyes hydrated.
    • I swear by this universal travel adapter – it not only allows to adapt from various plugs, but also has a USB and USB-C port for electronics charging. Since it can be used with most outlets, this is a great gift for anyone that travels frequently to international destinations.
    • Since different countries and regions often have different voltages, I asked for this dual voltage hair straightener last year for Christmas. This was the perfect travel gift as someone with long, curly hair who worries about frying their hair accessories.
    • If they don’t already have it, paying for one’s global entry application (or giving money towards it) is a perfect travel gift for anyone US-based that frequently travels abroad.
    • I love my LifeStraw reusable water bottle and take it with me on every international trip. This is an ideal gift for anyone that travels to locations that may not have drinkable water. You can also pair it with replacement filters!

    Miscellaneous Travel Gifts

    • This light-weight, quick-dry microfiber towel is great for folks that stay places without linens. It’s also great for those with curly hair, or looking for a lighter beach towel they can bring from place to place.
    • When I travel, I try to read a book set in or about my destination. It’s the perfect gift for any reader that travels.
    • I always bring my Loops earplugs with me. I clip them right to my wallet and they’re great for blocking out noise on the airplane when trying to sleep, or staying in shared spaces.

    Travel Packing Gifts

    Travel Gifts for the Minimalist Traveler

    • Spending money for their next trip, whether foreign or domestic currency, can certainly go a long way. My loved ones usually know where I’m going next, and I love receiving this as a gift so I can splurge on something I may not have bought otherwise.
    • Booking a tour or activity (or a certificate for a tour or activity) is a great gift for a traveler who values experiences over items.
    • Airline miles are a great travel gift for anyone with a preferred airline. They help with travel goals without taking up any space.

    There’s a Travel Gift for Anyone

    Whoever you’re shopping for, there’s a perfect travel gift out there for them. Hopefully this list is a useful jumping off point for your holiday shopping. When in doubt, ask your traveling loved one; I’m sure they have ideas of their own as well!

  • Managing Your Mental Health While Traveling

    Managing Your Mental Health While Traveling

    How to handle your mental wellbeing while you travel

    Sunset over Porto, Portugal

    Transparently, I have struggled with mental health for a majority of my life. Having been diagnosed with anxiety and depression while still in school, I’ve spent a lot of time learning how to manage it. While traveling brings me joy, it doesn’t just erase those diagnoses.

    Even without a diagnosis, it’s important to be able to manage your mental health. It’s especially important in a foreign place, and even more so if you’re solo traveling. Often traveling takes you to new time zones, climates, and other elements that could affect you physically. Physical exhaustion can lead to mental symptoms as well.

    Below are just a few ways I take care of myself when I’m traveling. These apply regardless of destination and I hope they help you as well.

    Schedule relaxation time.

    It’s incredibly easy when traveling to want to see and do everything at your destination. I am often guilty of this myself. I try to maximize my days and stretch myself thin. Something that I’ve had to learn to do is schedule in time for relaxation.

    Sometimes, this is as simple as going to a cafe and people watching. Other times, it’s ensuring I’m in bed with my book at a reasonable hour if I have an early morning. When my friend and I travel together, we have “rot time” where we decompress at the end of the day with our own books or on socials for a little before dinner or bed.

    I’ve found that it’s really important to plan for this time. If you don’t, you’ll likely find yourself exhausted far too quickly. That exhaustion can really affect your mental state.

    Eat well.

    I’m someone who loves trying to eat like a local when traveling. Food is often a primary motivator for selecting a destination. Who doesn’t want to eat all the gelato in Italy?

    On the opposite side of that, it’s easy to grab quick snacks or not eat proper meals if you have a busy day. Unfortunately, when you aren’t eating well, your body tires more easily.

    Aside from making sure I eat meals, I also try to balance what I eat. As someone with a sensitive stomach, I try to avoid only eating unfamiliar foods. If I’m not feeling well physically, I know it’ll affect me mentally.

    Stay hydrated.

    Similar to eating well, it’s important to stay hydrated. Again, this helps reduce physical exhaustion that can lead to mental health decline. Make sure you are hydrating throughout the day, even if you don’t necessarily feel thirsty.

    Take any prescription meds.

    Keeping your medication routine is vital to maintaining your mental health. Even when you’re traveling, keep up with taking your medications on time each day. A shift in keeping up with most meds can have detrimental effects. Set an alarm or put your meds for the trip in one spot you’ll go to daily.

    Keep a routine.

    At home, I’ve been managing my self care with an app called Finch. It consists of a check-list with reminders to do things such as making my bed and taking my medication. When I’m traveling, I try to maintain those same routines consistently as they apply.

    You are not alone.

    Regardless of how you manage your mental health, know that you are not alone if you are struggling. It’s okay to not be okay 100% of the time. Even if you love traveling and having new experiences, it’s normal to have moments of anxiety or other mental struggles. Take care of yourself as best as you can. Not every solution fits for every person, but try to stick with the basics that work for you.

  • Pre-Travel Checklist

    Pre-Travel Checklist

    What to check before a trip

    Transparently, I can be an anxious traveler. I like going with the flow sometimes once on a trip, but I am big on research. I like to check out information about an areas culture and dress codes. If there’re any entry requirements, I’m finding that out ASAP. Below is my typical pre-travel checklist.

    The timelines here are merely suggestions in most cases, but these are items I check for before any trip. I’ve also included a list of everything I’m sure to pack (in addition to clothes of course).

    Note: This article may contain affiliate links so that I may earn compensation for qualifying purchases as part of the Amazon Affiliate program.

    Laptop open to travel entry requirements

    Before booking

    Entry requirements

    Though I don’t typically act on it immediately, I always check entry requirements of the country I’m planning to visit before I book. This way I know how far in advance I need to book for, what can be last minute vs. not, and what additional costs I may incur.

    The best place to confirm this is always with official government agencies. I recommend checking both the point of departure and your destination to confirm they have the same information.

    Things to do/activities

    Why book a trip with no idea of what you want to do? Even if you’re not a pre-booker or planner, this helps determine the ideal length of your trip. You may also find that some activities book up well in advance, and you want to be prepared for those things you have your heart set on.


    6 months out

    Confirm your passport expiration date.

    Most destinations require that your passport be valid for at least 6 months after your trip, in case of emergencies. This is the case for the United States passports, and may be for others as well. I try to check my passport’s expiration date well in advance of the trip to give me time to renew if necessary.

    Research transit options to/from airport.

    Some group trips include this service, in which case I omit this from my planning. However, I otherwise try to check in advance whether I’ll need to arrange transit upon arrival. If it seems that I need to book private transfer or make special arrangements, it’s good to know in advance.

    Check with your doctor about vaccines and medications.

    One perk of having family in global healthcare is always having access to information on what vaccines or medications are needed or suggested for a destination. For example, it was recommended that I get a typhoid vaccine and prescription for altitude medication before Peru. Some countries actually mandate certain vaccinations, such as the Yellow Fever vaccine for Kenya.

    Talk to your doctor and check government sites to see what is needed for your trip. Do this in advance in case you need to make an extra appointment or the medication needs time to function.

    Research (and purchase) travel and medical insurance

    If you read my blog on handling medical emergencies while traveling, you’ll know that I have firsthand experience in trips gone wrong. Always make sure that your medical insurance covers you at your destination. If it does not, you’ll want to make sure you get travel insurance that does. Pre-departure, you may also consider getting travel insurance to cover things like trip interruption or lost luggage.


    1-2 Weeks Before Departure

    Check your prescription medication supplies.

    Always check to make sure you’ll have enough of whatever prescription medications. You’ll want to make sure you have enough to get through your trip, and a couple days extra just in case. If it doesn’t seem like you will, get in touch with your doctor. Especially in the US, it can take time to get an early refill, even for travel.

    Stock up on hygiene products.

    Restock your travel hygiene products at least a week out to avoid a last-minute rush or overpaying at your destination.

    Confirm destination outlets.

    Check if you need adapters or converters for your travel destination. Checking in advance means giving yourself time to order them if necessary.

    Notify your bank of your plans.

    The last thing you want is to end up in a foreign country without access to money. Notify your bank and credit card institutions of your travel plans to avoid freezes.


    Packing List

    You may find some of these items in my article on my top 5 packing essentials for international travel. That being said, below is a list of the main items I aim to pack for every trip. These are things that are tried and true, and I’ve found useful over the years. I also pack some things according to destination or climate, so this is not a complete list!

    Aside from my clothing and other daily items like toothpaste and a toothbrush, I always make sure to have the following in my bag.

    • Portable charger
      • I have a few different versions, but I always bring at least one portable charger. One of my personal favorites is the linked anker battery. I always make sure I pack an extra cord as well, as some locations don’t sell certain output types (like USB) for all chargers!
    • Reusable filtered water bottle
      • I started bringing this with me on a trip to Belize and Guatemala but have started bringing it everywhere. I personally prefer Lifestraw due to its ability to filter out more microorganisms than some other brands, and how simple it is to replace the filters. As someone with a sensitive stomach, the last thing I need is to get sick from my water.
    • Electrolytes
      • Electrolyte drink powder is a lifesaver on long travel days, in high altitude, and hot/humid destinations. I’ve tried a few kinds, but some of my favorites have been Waterboy and Liquid I.V. The latter also has a sugar free version if that’s a concern! As a side note – do not use these in combination with your filtered bottle unless you want a big mess.
    • Multi-port charger/outlet adapter
      • Like I mentioned in my previous packing article, I prefer to take a block with multiple output options. This simplifies what I have to bring with me, and can charge more than one item in shared spaces or accommodations with few outlets.
      • Depending on location, I also bring an outlet adapter (note that this is not the same as a converter). I typically bring a universal international adapter, and sometimes a location-specific adapter as well. The adapter that’s linked has a slot for a regular plug, as well as a USB and USB-C port.
    • Prescription meds
      • I’m somewhat of a walking pharmacy with my various prescriptions. They’re the first thing I make sure I have enough of when I’m packing.
    • Tri-pod & camera equipment
      • Especially on solo trips, I bring my flexible phone tripod and use it with the included remote or just my watch controls. Sadly I did leave this one in a bathroom on a mountain in Madeira (RIP) but I loved it so much I replaced it when I got home.
      • I also bring equipment specific to my camera (charger, memory cards, etc.). Something I recently got was this card reader that connects right to my phone for instant downloads. I can’t wait to use it on my next trip!
    • Small bag
      • Whether a tote bag or my stowable backpack, I always have a small, empty bag with me. This way, I don’t have to unpack a carry-on for day-trips and tours.
    • Disinfectant wipes
      • Both surface cleaning and hand wipes are essential, in my opinion. It’s so easy to get sick while traveling, and this is one way I try to combat it. (Plus, they were a godsend when I dropped my phone in an airport toilet….)
    • Headphones and/or ear plugs
      • I LOVE my Loops ear plugs. They’re perfect for air planes and public transit when you don’t necessarily want to listen to music or watch a movie. Personally I prefer the Switch model so I can have different levels of noise cancellation for my comfort and safety.
    • Lightweight towel
      • While most places I stay have linens, I always pack my lightweight microfiber towel. It’s an affordable way to make sure I’m always covered. It’s also one way I keep my curly hair semi-tame when my routine is otherwise interrupted.
    • Camping toilet paper/wet wipes
      • I’ve been in one too many situations where I or my travel companions have been left without toilet paper. This is more common in some locations than others. I now always travel with some toilet wipes in my wallet, and/or a roll of travel toilet paper for camping. Fun fact: this preparedness has also spread to my “must bring” list for concerts and events.
    • Stain remover wipes
      • I am MESSY. I can’t order a coffee or have a meal with sauce without getting something on myself. Enough said.
    • First aid kit
      • As much as I’m messy, I’m about twice as clumsy. I recommend packing even a simple first aid kit with disinfectant, bandages, painkillers, etc. For me and my ankle issues, I also bring an ice wrap for the end of long walking days.

    Packing for Hot & Tropical Climates

    • Bug repellant
      • When I’m tight on packing space, I opt for repellant wipes that don’t count against my liquids and are more lightweight. Otherwise, I like my bug repellant lotion, gifted to me by a family member who works in travel health.
      • Note: I’ve tried the bracelets. They did NOT work for me. Do with that what you will.
    • Sunscreen
      • Try to make sure whatever you bring is reef safe if you plan on entering the ocean. I always bring this sunscreen stick for my face and sun-sensitive scars. Sometimes it’s cheaper to purchase your regular sun cream before arriving to your destination, so check before you go!
    • Portable fan
      • I bought this fan for my trip to Texas and it’ll be making a repeat appearance on next year’s trip to Tanzania. As someone who doesn’t do well with heat tolerance (thank you, Lexapro!) having this on hand is essential.

    For colder climates

    • Layers, layers, layers!
      • Bring different length sleeves, varying thickness jackets, and even vests. I like to try to shop these resale – The North Face, Cotopaxi, REI and Patagonia all have a used clothing site. Items can be a fraction of the price and it’s a good way to save money and shop sustainably.
    • Ear/head covering

    My best advice to travelers is to be prepared. Even if you’ve been to a location before, regulations change all the time. Always check your entry requirements and documents. Have an idea of what you’ll do once you’re there. Research the culture (including money culture!). Make sure you know what currency is accepted and if cash is required. Look into any specific packing needs – I’ve found TikTok and Instagram to be great resources! Most of all, enjoy that anticipation!

  • Underrated Things to do While Traveling

    Underrated Things to do While Traveling

    Unique experiences in foreign places

    We’ve all seen the articles toting the can’t-miss experiences in new places. In fact, I’ve written my own versions of that blog. I’m all about being a good combination of traveler and tourist. Of course I’m going to see the Eiffel Tower in Paris, and I’m going to visit the Colosseum in Rome. But what are some of my favorite unique things to do in a new country? Keep reading to find out!

    International Fast Food Chains

    This one sounds silly, I’ll admit. It also sounds like one of the most American things I could imagine doing. That being said, visiting a familiar fast food chain in a new country is something I almost always try to cross off my list.

    This tradition started unintentionally. When I was doing a program through school in Italy, our hosts brought us through a McDonald’s while on a road trip. My friends and I realized that Italy’s version had different flurry flavors than ours We then started digging into more unique foods within the food chain.

    As it turns out, a lot of McDonald’s (and other fast food chains) in countries outside the U.S. have their own unique menu items. Even if I don’t eat a full meal, I make it a point to stop into one if I’m passing by. It seems I’m not alone in this, as my group tour in Morocco included an impromptu visit to a Moroccan McDonald’s to try their menu as well after much prompting by my fellow travelers.

    “Fancy McDonald’s” of Porto, Portugal

    One of the best McDonald’s restaurants I ever visited was by the train station in Porto, Portugal. The building is designated as historical, so the chain was not allowed to remove a lot of the decor. What decor might that be? Stained glass and chandeliers!

    My friend and I made a few return visits to what we lovingly called “Fancy McDonald’s.” Not only was it a neat atmosphere, but my friend is a vegetarian and they had several options in Portugal. We learned on our walking tour that week that Portugal actually serves vegetable soup even at fast food chains because it’s tradition to have that before a meal in Portuguese culture.

    Visit a local grocery store

    Another thing I like to do when visiting a new country is making a trip to a grocery store. Sometimes it’s just going to a convenience store, like one of the many 7/11s I went to in Tokyo. Other times, I’ve stumbled across a regular marketplace. I often want to have snacks for the room or for day tours, and what better place is there to find those? Rather than going for my home favorites, however, I try to find at least a couple of snacks from that country.

    Sometimes, though, it’s fun to see the names of snacks back home, in the place I’ve landed. For example, did you know that Cool Ranch Doritos are known as “Cool American” in Iceland? Some home favorites also have unique flavors in different places, like the jamon chips I tried in Spain.

    Visit a small coffee shop or cafe

    If you’re like me, you find joy in a good cup of coffee. In addition to the coffee itself, I love to find a place with a good atmosphere. That is why I love to find a cafe to sit back at if I have down time on a trip.

    I can tell you of a lot of good places I’ve had good coffee – Latin America and Italy being two of those places of course. My go-to way to find the best is by asking locals. That’s how I found Three Monkeys coffee in Cusco, Peru and SO Coffee Roasters in Porto, Portugal.

    I have also, however, found some really wonderful shops by wandering by and stopping in. A favorite traveling experience of mine was when a friend and I did just that while waiting for a tour in Cardiff, Wales. Since it was an early morning, we stopped in a shop called The Bike Lock near the meeting point. We got chatting with the gentleman behind the bar, who told us all about the local sourcing they do and the shop’s community involvement. I immediately gave them a follow on Instagram and shared with other friends that were going to visit the area. My friend and I rather enjoyed not just the coffee, food, and people watching, but the story behind the spot.

    Take a walking tour

    A lot of people likely prefer that their tours be for specific sites at their destination. I used to also believe this – if I wanted a tour, it was going to be TO somewhere. However, I’ve more recently started enjoying walking tours on a lot of my travels. An added perk is that they’re usually relatively low in cost. I’ve even found a few that you can receive for a suggested donation!

    All of the group tours I’ve taken usually have an orientation tour upon arrival. I’ve often learn more about the cities I’m in on some of these walks than I would have on my own.

    Pre-Booked Walking Tours

    I’ve also pre-booked walking tours on trips I’ve planned on my own. One of my favorite tours I took was through Airbnb experience in Porto, Portugal. We walked all around the city and saw touristy sites, but also learned about some lesser-known parts of the city. At the end of the tour, we received a picnic lunch that we could enjoy there or take to go.

    Often, you can find a themed walking tour depending on the city. In Edinburgh, Scotland, a friend and I took a tour inspired by the wizarding world of Harry Potter. Since we were broke college kids abroad, this one was especially nice as it was donation-based. I’ve also seen advertisements for (and plan on doing in the future) a Jack the Ripper walking tour in London.

    If you have some free time, or plan to do some solo exploring, I highly recommend taking a walking tour. You never know what you might find, or what your local guide may recommend!